Archives

All posts by Scott

Build and Review by Robert Seinko – ACME

Robert’s review is long overdue because of me but fits in well with the recent release of the 1930 Ford kit by Revell. Hope you enjoy reading about and seeing Roberts build – Wayne

Hot rods first appeared in the late 1930’s in Southern California where people raced  cars on dry lake beds under the rules of (SCTA) Southern California Timing Association among other groups. This gained popularity after World War II because many returning soldiers received technical training.                           

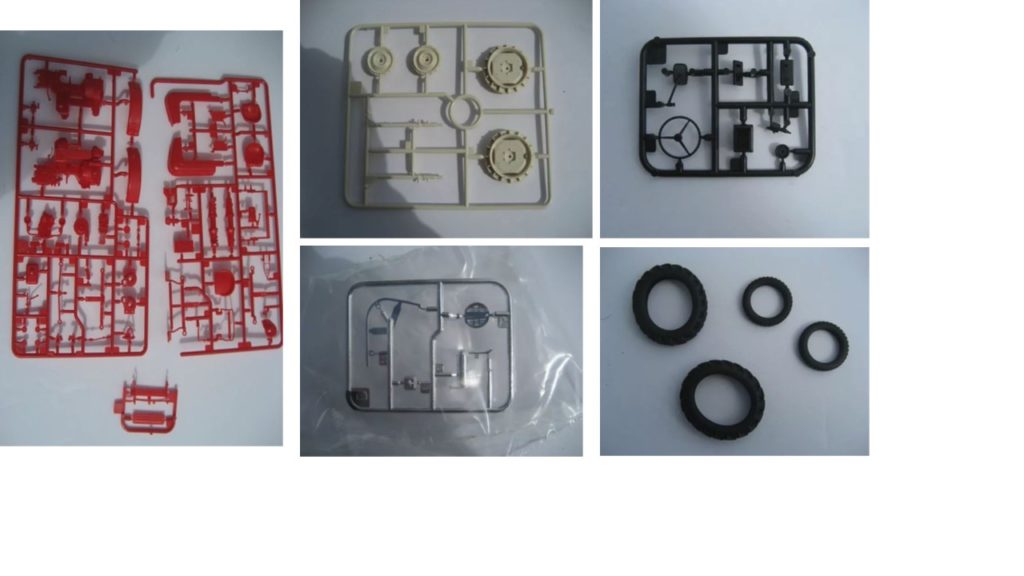
The first hot rods were old cars usually typically Fords T’s model A’s, or model B’s. Ford’s flat head engines were very popular because of their power the ability modify them for more power & speed. Typical modifications included removal of convertible tops, hoods, bumpers, windshields, and or fenders to save weight and channeling the body for a lower profile. Most early hot rods used wire wheels of the era, however as time went on and the introduction of the steel wheel, a lot of hot rodders began using these for better strength and they looked cool too.                                                       That leads me to the Revell ’29 Ford model kit, it is a little different than the one issued a few years back and quickly went out of production. The main differences are the engine build choice and only one body but two choices of wheels, 2 frames, and 3 choices for headlights are included in this release. Thus said this kit looks to be engineered as well as any of the newer Revell kits issued over the last 15 years.

The inspiration for my example was the ’32 Ford hot rod in the first and second Iron Man movies. This car was owned by the director John Favreau and was used as all the computer screen savers in the movie. The license plate reads “Stark 5” which I will recreate. I realize the movie car is a ’32 and not a ’29 but I love the chassis in this kit with the finned brake drums and exhaust pipes that are close to the movie car. I will use the same paint scheme with left over flames from another kit, 3 carb set up and steel wheels. 

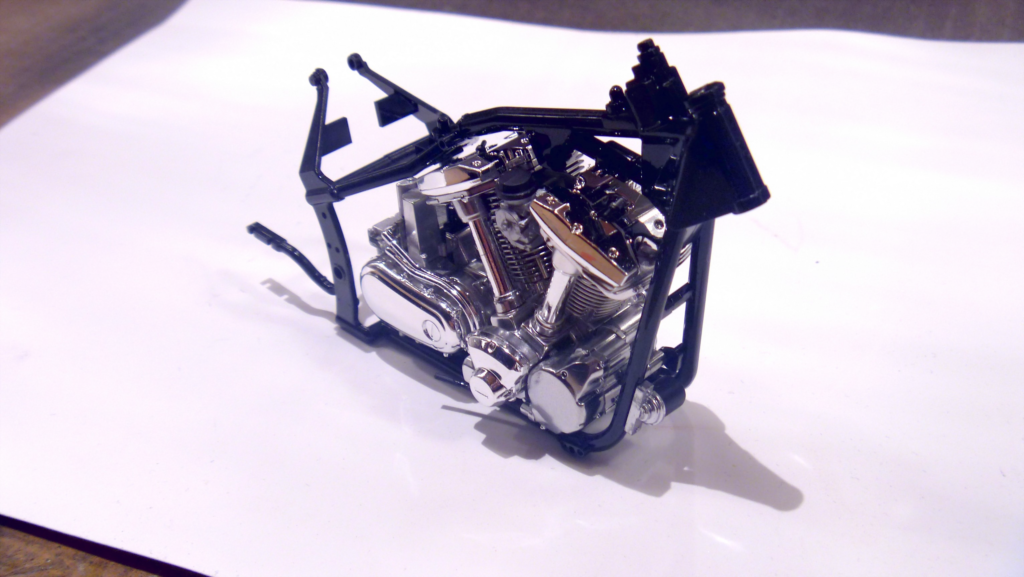
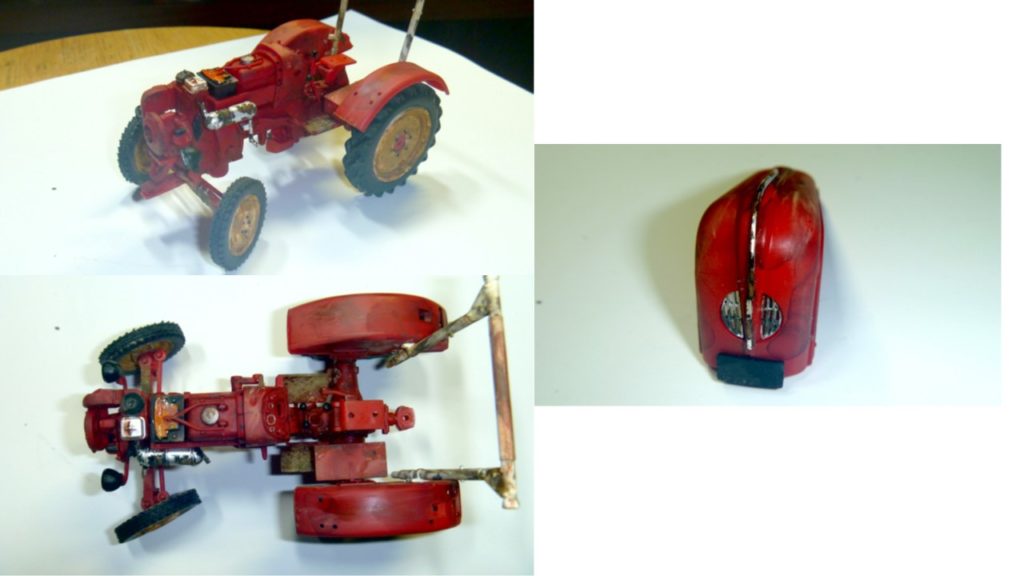
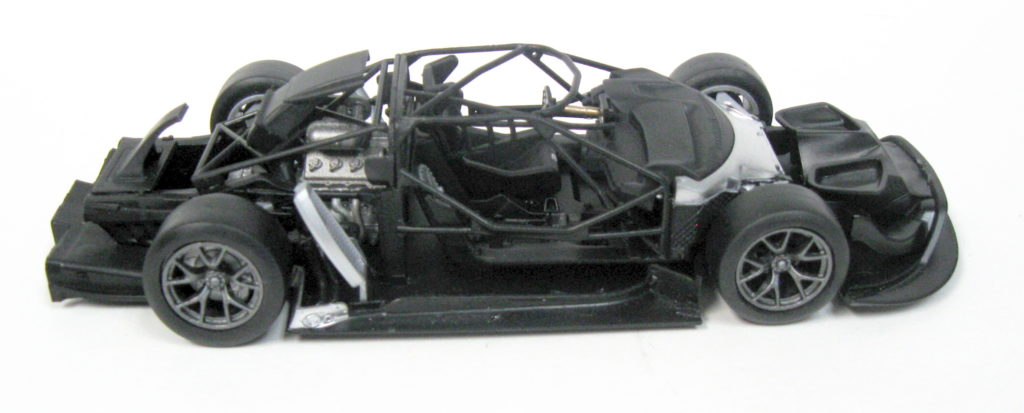
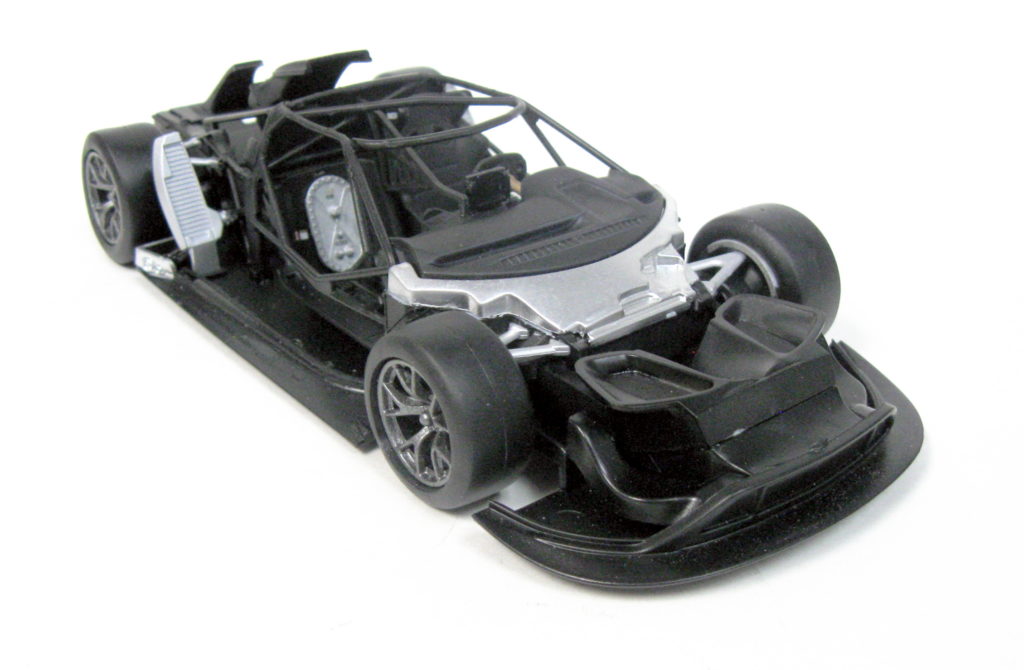
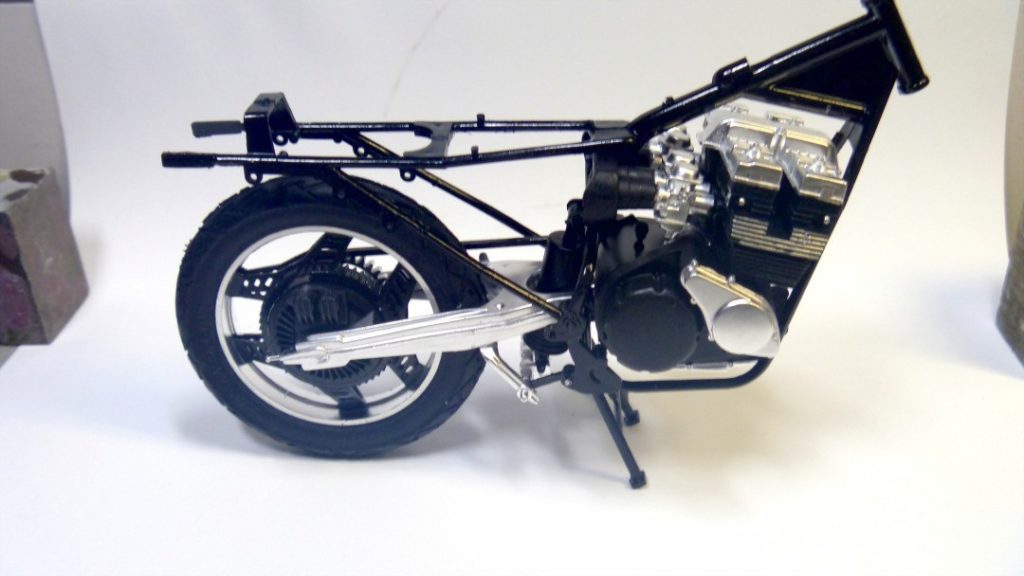
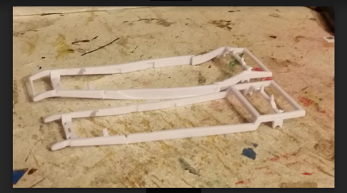
Now, onto the kit, on the direction sheet (which to me is a bit vague in some spots) you have a choice of A and B assemblies for engine, and chassis. Many of the same pieces are used in both assemblies, pay close attention to the photos, and reread the pictures to make sure you are using the correct parts for your version. I could not find a reference to what kind of engine this is but it looks very much like the one used in the Revell ’51 Mercury kit. I chose the 3 carb set up because it was closer to my Stark hot rod. After minor cleanup of all parts and painting it went together perfectly. It was painted with Model Master Chrysler Red over flat grey. Chassis A is the standard chassis, chassis B is for the lowered version, I went with the lowered chassis B, here was a small hitch, the transmission cross members are mislabled in the directions. A fits B and vice versa, it’s pretty obvious when you go to assemble them. One is too big, and one is too small. Not too big of a deal though. Another small glitch the tie rod assembly was warped and had to be gently bent back to fit the pins on the front axle. Everything else on the chassis assembled perfectly using the appropriate B components.

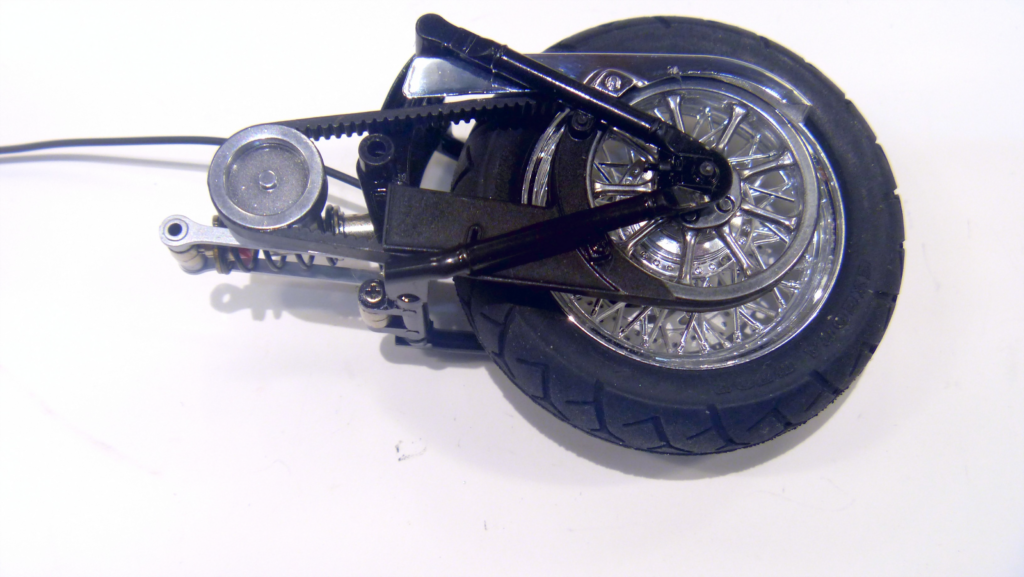
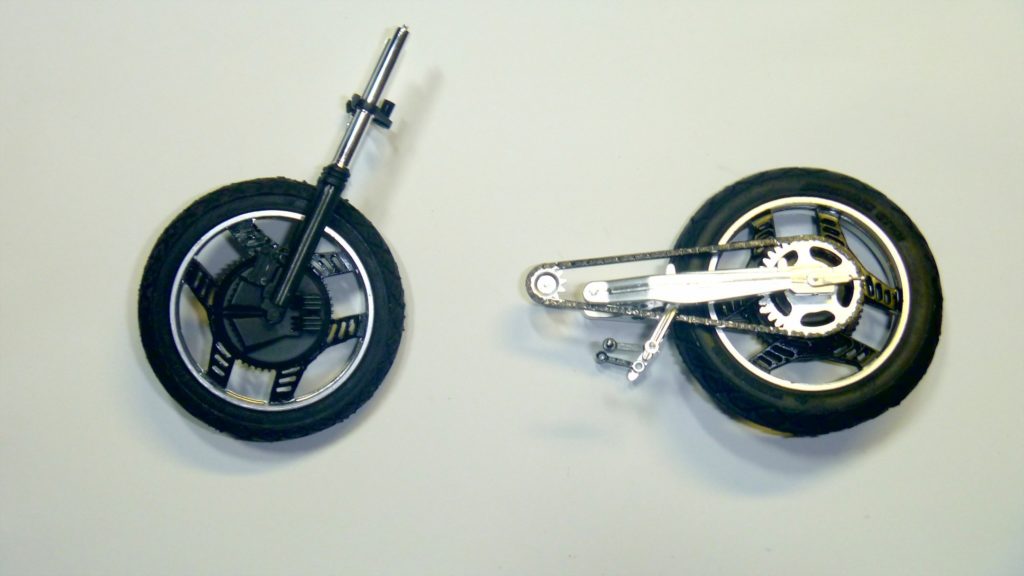
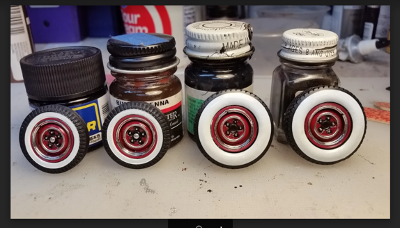
Assembly of the wheels was excellent, I wanted to use the steelie look again from the Iron man movie car. The wheels are a darker red than the interior and engine, so I chose Rustoleum Colonial red. Beauty rings have a tiny indent where the molded in air valve fits which is brilliant. The white decals went on without any problems and settled in without any decal setting solution. I used one of my Molotov Chrome pens for the inner silver ring, lug nuts and grease cap on front wheels. Brake backings and brake hubs fit perfectly although the metal mounting pins were missing from my kit, I could have ordered new ones, but I wanted to get this finished so I made some from wire, you can’t see them, so it doesn’t matter.      

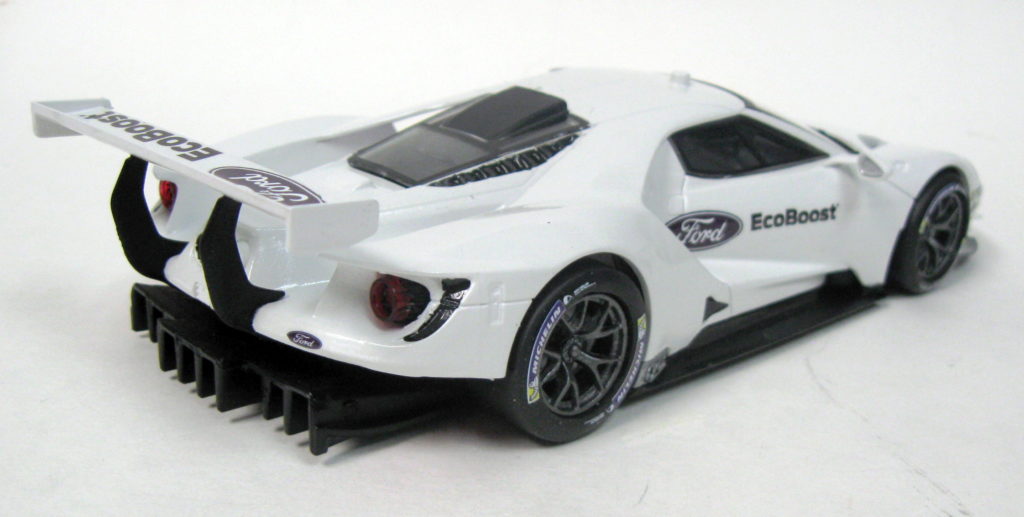
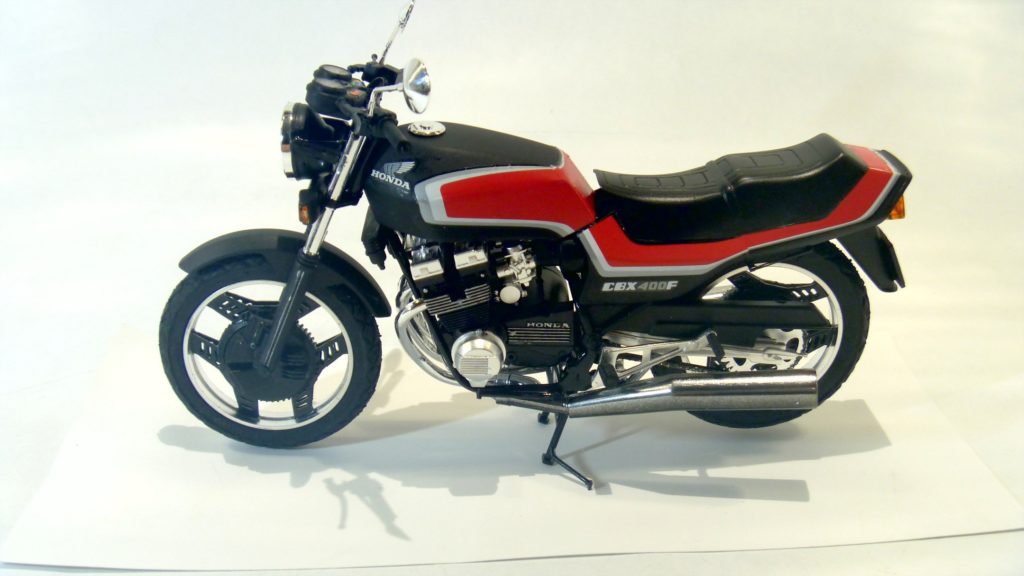
Body was painted with Testors black enamel and covered in 2 coats of Tamiya clear, buffed, and polished. I chose the channeled style of build which of course fits down over the chassis, so you need to choose the proper interior pieces which I painted flat black then covered with two coats of Krylon matt Poppy Red, it gave the panels some depth without having to add a wash to them. Steering wheel center has a nice decal for detail and the stick shift has 2 different decals, a shift pattern, and an eyeball, pretty cool. I went with the shift pattern for my version. 

I could not find an interior shot of the Iron Man car so a went down to worm hole of Google to find inspiration. I decided to flock the floor with a maroon material I had and am very happy with the look.

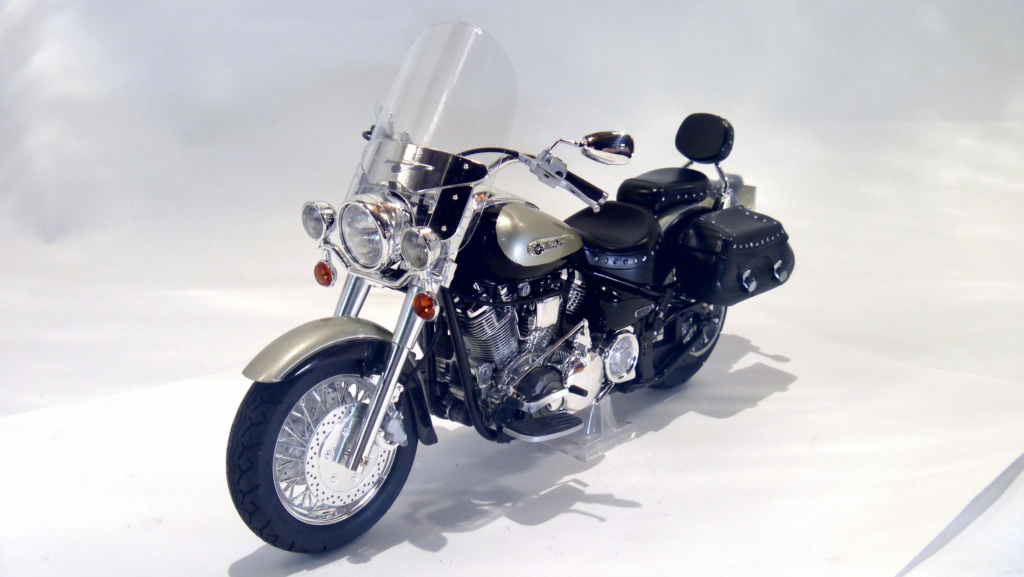
My windshield was slightly warped, instead of trying to repair I used as is, I was afraid it might break. Other than that, everything else went together fine. Door handles, rear lights, and head lights all fit perfectly.

To sum it up, this is a very cool kit with a few minor hiccups that barely detract from the build. Take your time, decide which pieces you want to use and have fun. I give it 9.2 out of 10.                      

Review by Joe Fotschky

I want to start out by saying that this is my first Tamiya kit build. So if I happen to point out the obvious features of a Tamiya kit please understand that this is my first experience building one of their models. I typically build 60’s and 70’s muscle cars and those are usually Revell and AMT kits.

This kit can be built in one of three versions and I chose the US version, but you can choose the Japanese or European version for your build. 

Opening the box up and inspecting the contents made me realize that this was a different type of kit than I am used to building. The parts trees were molded in different colors which upon further inspection is a nice touch since the parts that were molded in black would either be painted black or grey. The kit contained a sheet of decals and two new firsts for me to have in a kit were metal transfers and window masking stickers.

The instruction manual is very well planned out and there were no issues following the assembly steps. It did help by going through the manual and cutting the parts of the versions you are not building off the trees and tossing them in your spare parts box. I am familiar with the Tamiya paint line and was happy to see a paint guide that corresponded to their paint colors in their instruction manual.

One thing that surprised me was that this kit did not come with an engine or transmission. I was not disappointed by this as the chassis and suspension is nicely detailed as it is made up of more than 30 parts.

The interior was nice to paint and assemble as the door panels, console, dashboard, and seats were made up of multiple pieces. I painted the interior black with German grey accents on the doors, console, and seats to help add a little color to break up the all black interior. There were many decals applied to the interior, many will probably never be seen once the model is completely assembled.

The body of the car that receives paint is made up of six pieces. This is where I needed to decide what body parts I wanted to or could glue together that would not cause assembly issues down the line. I chose to cement the front and rear facia as well as the two door sections to the body to eliminate any issues with glue accidentally meeting fresh paint. The hatch was left off so I would have access to place a Toyota badge from the back in later steps. The body had only one set of faint mold lines on the side of the body that were easy to remove. The car was painted with Tamiya lacquer metallic orange LP-44 that Bob Downie gifted me for this project.

Window painting and install went really well. The kit comes with pre-cut window masks so you can easily paint the black trim on the inside and outside of the window glass. The windows come with big tabs that fit in to recessed areas molded into the backside of the body and gives a good surface to glue the windows in.

I was amazed by the headlight assembly. One headlight is made up of five plastic parts and six decals, it’s a model all by itself. Just like the windows the lights had big tabs with recessed areas for them to be glued in with a positive fit.

Grills, vents, and other trim pieces were all separate pieces and not molded into the body. This allows you to paint them as single units and attach them to the model which make for a clean look.

I liked the body to chassis connection as no glue was used to mate them together. You simply slide the front section of the chassis into slots in the body and push the rear down where it is captured by a plastic spring tab that is molded into the body.

This model and its engineering left me feeling really positive throughout the entire build. This is the eighteenth model I have built since 2010 and it is one of the best if not the best I have built.

I am sure many of you have seen the various “Woodies” built by Robert Sienko at our meetings, various contests, in Scale Auto, or on Face Book. To say Robert has mastered using wood to create unique models is an understatement.

Robert Brough several samples of models he has used wood on to either create a more realistic pickup bed, add true wood panels to a Woodie, create scale surf boards and even create complete bodies for his builds.

He information not only the types of wood he uses but also where to find them, how to work with them from original shaping to finishing, staining, etc. .

Check back tomorrow for some pictures from his workshop,

Well, it’s a Tamiya kit so it’s likely to go together trouble free. Here is the spread of all the parts trees
in the box:

Here’s the engine installed into the frame. The main frame goes together quite easily as there’s two sides and a small middle piece. It also has a nice kickstand that attaches with a metal bracket that gets screwed into place. The engine color calls for polished aluminum, so I used the AlClad Polished Aluminum. The engine also assembles very nicely and pretty easily too. It was easy to insert into the frame too, it’s held in place with three screws.

Here’s the shock assembly, it was pretty easy to build and paint. I used the Al Clad Titanium Silver as opposed to the Tamiya color, although I have both. I think this assembly will be completely hidden when the model is completed.

The wheel is a little trickier, first I had to drill out all those little holes in the brake rotor. It goes together easy enough but there are little mating pins on the inside ends of the spokes to align with the hubs, I used CA on it. There is an inner brass tube for the axle, once it’s together you have to insert it into the tire. You have to be more careful than on the racing type bikes with the one piece wheels. You don’t want to push against the spoke while inserting the wheel into the tire. That’s a good way to break the spokes and then you’re in some real trouble. So as you can see I got the wheel into the tire correctly.

I have the belt and pulleys all painted up, I painted the pulleys with Al Clad Polished Aluminum. One detail that’s a little lacking is that they didn’t mold the teeth into the rear pulley on the inside where the
pulley is exposed. The front doesn’t matter as it will be hidden anyway. It turns out that when it’s all installed into the rear swing arm there is a lower guard in front of the rear pulley so you wouldn’t see the teeth anyway. I masked over the pulleys so I could brush paint the flat black onto the belt without messing up the pulley sides because the belt’s height is a little above the pulley’s and I wanted the paint to cover it.

The rear swing arm went together fairly easily. But it was a bit tricky getting together the left side with the belt/pulleys and lower belt guard together. Once that assembly was dry then the rest was pretty smooth.

So far this kit has been going together very well. Next is installing the rear swing arm into the frame.
That went pretty easy too.

Now here are the fenders and gas tank. The rear fender is three pieces and the gas tank is in two halves. The two side skirts on the rear fender I painted separately. I painted everything else in Tamiya’s champagne gold. Those Tamiya lacquers have nasty fumes, I had perfect weather to spray them outside. It also does not have a high gloss shine. So next I masked the gas tank. They give you a pre-printed masking tape and the instructions show you how to place them. I easily masked the front fender to paint the sides. After all that was dry the next day I painted Testors clear gloss coat over it. See the photos below.

Now the model is starting to look like a bike. The fork went together pretty easily. I did have to do some detail painting on the brake calipers and paint some black onto one of the chrome cross pieces. I installed more detail parts onto the frame and installed the fork onto the frame. When I glued the two halves of the mufflers together I didn’t like the seem line so I sanded it smooth and used Al Clad chrome on it. It came out pretty good. There is a bracket molded into it that gets painted black, easily done with a brush. The gas tank has a nice emblem on the side. It’s chromed and then detail painted, easy to do. I used black India ink for the recessed letters and the Star. and I used a champagne gold enamel I had to paint into the “wing”. The directions called for metallic gray but the box art had the champagne gold so I went with that. There are a number of rubber hoses to hook up for the brakes and clutch. I have some hooked up. Those are a little tricky to push onto those tiny plastic pins, I usually stick a sewing pin into the hose to stretch it a little bit.


The footrest assemblies went together pretty easily, some painting is required over the chrome parts. They align with square pins or round pins with a flat. The assemblies then attach to the frame, I glued
them on but they each get a screw to really secure them in place.

Now the bike is finished. I have installed the final details, the windscreen, the mirrors, the headlight assembly, etc. The seats and saddlebags were easy to assemble and I sprayed them semi gloss black and used Molotow Chrome on all the rivet heads. I used it on the handle bar and foot peg ends too. All the lenses were clear and I used the Tamiya clear orange and red to paint them. I found I had left off a few
small decals in places by the time I was nearly finished but they were all accessible to apply them. A really good kit to build, now onto the rider figure.

The model even has a working kickstand.

Here’s the kit. He can be built two ways, The first as you see him in the box art. The second is with him wearing a woolen beanie cap, holding his helmet and he also has sunglasses he can wear. I think I’ll build the second pose. You can see the two pictures on the instruction sheet.

I have not built a figure before so I don’t know how good I’ll be able to paint him but he’s going together real easily. The texture is well molded and he’s looking pretty good so far. First here’s just the legs:

The jacket assembles over the legs in three pieces. But first I painted the legs blue. It doesn’t matter what shade as jeans come in so many. Then I dry brushed some light blue and then white over it. Next I painted the leather jacket. The instructions call for semi gloss black as shown in the box art but I went for a brownish color that looks just like a jacket I have. The color is Testors Rubber which is really just a dark flat brown. So I painted the three pieces first. Then I did the arms the same color. There’s also the gloves and the hood. The hood and what you can see of the shirt are flat gray. The shirt is part of the leg assembly.

The next challenge is the head, especially the face. Here’s what I’ve done so far:

I painted the skin with Testors Skin Tone Warm Tint, the lips were painted with highly thinned red. At first it looked like lipstick, but then I lightly painted the Skin Tone over it and that made it look realistic.Here he is all finished. He seems to have a blank stare but it is what it is.

And both together:

Revell 1970 Plymouth AAR ‘Cuda Kit Number 85-4416

Kit number 85-4416

I may be a little biased – this is my favorite muscle car of all time. A family friend bought a Lemon Twist for his wife in late 1969 or early 1970 and at the age of 13 I fell in love with the car and as they say, “The rest is history”.

This is an updated re-release of the 2013 issue of Revell’s 1970 Plymouth Hemi “Cuda kit number 85-4268 with the correct parts to build an AAR. There are even some extra parts included in the box. There is an amazing number of decals in the kit including those for the battery caps and marking for the heater hoses. With additional research, time, and patience it can be built into the best AAR ‘Cuda possible.

This one is built “box stock” using no aftermarket parts using only various paints and Bare Metal Foil to enhance the details. I wanted a “Vitamin C” colored body with the period correct white and black interior.

Pro’s: Extremely accurate details with accurate AAR parts. The model went together very well, so well I look forward to building another.

Cons: The decals are slightly thick, needing patience to get them to lay down flat. With the addition of white strobe stripes the builder would have the option for additional body and interior color combinations.

Overall, I highly recommend this kit and if you love Mopar Muscle it is a must have.

Regards,

Harold Sullins

ACME

Mike Crespi builds and reviews Revell’s Porsche Junior Tractor


It’s a pretty uncomplicated kit to build, and a snap kit too with pretty good detail. It’s not a curbside. Unlike any other model vehicle I’ve built this one builds around the engine. The engine and transmission is one assembly.

You then attach the rear end and front axle and everything else. I decided to build it weathered. Looking for pictures of the 1:1 tractor on line I found over 20 of them of a tractor that’s for sale for $48,000. It’s in mint condition but I was hoping to find an unrestored one. I found other rusty tractor photos to help me with the weathering.


When you open the box it’s only about ½ full, no large body, chassis or interior tub parts. Most of the plastic is red, you can almost build it without painting it, just a few details. I started with flat red since it will be weathered. It looks like it can mostly assembled before weathering.

Here’s photos of what’s inside the box:

It comes with nice rubber tires too!

Well, here’s the engine/chassis going together. The engine/transmission/rear end essentially form the main
structure of the tractor. I still have to weather it up and add the rust and dirt. Here’s the rear wheels:


Here’s the main assembly so far:


This model is certainly going together easily, very little flash and the parts fit together well. You can almost get away without painting. Here’s more photos of it nearly completed.

This kit has a nice decal sheet but the directions doesn’t quite show where they all go.

I’ve been using the Rust All weathering kit along with a Rust antiquing kit by Sophisticated Finishes which has a gray iron paste and a chemical to turn it into real rust. I also used some rust colored pastels.

Well, it was a nice easy build, I enjoyed building it too. A good quality kit. Here are some finished photos:

Steve Linngren builds and reviews Revell’s Ford GT-LM

The Revell Ford GT Le Mans 2017 kit is probably the most complex model I have ever built but the comprehensive 44-step instructions played an important role in a successful project. 

The 16-page instruction document contains a paint guide that lists the 15 colors required for this build.  I studied that paint guide so that I could acquire the colors I did not already have before I began working on the kit.  There is also a section that identifies all the parts that make up this kit.  The kit contains 101 parts and is cast in white plastic, clear plastic, red plastic and soft rubber. The section titled “Read this before you begin” is also valuable in supporting a successful project. The kit is very well designed and I did not have significant problems with parts fitting together.  Nearly all of the parts fit well, but I still used trial fits for all of them to learn how they worked together.

One issue I encountered was with the two-piece body.   Because of the long seams, I glued the two main body parts together in phases to simplify the process.  After I assembled the two body pieces, I noticed some gaps in the joints and decided to fill them with body putty to improve the appearance.

Another issue appeared after I applied a coat of Duplicolor Automotive Sandable primer to the body.  I noticed several very fine mold lines on the front and rear fender tops and the front and rear valances.  I sanded them away and proceeded with the finish.

This kit contains many decals to enhance the realism of the model.  Since they need to be installed after particular areas have been painted, the order of a few assembly steps had to be changed.  Many of the decals are quite small and require real concentration to handle and put in place.  I put a small tweezer to good use for that process.  In my case, I decided to build the Ford GT Le Mans 2017 kit in how I imagined a street livery would look, and I did not need to apply all the exterior decals.

The body is painted with Duplicolor White Sandable Primer, Duplicolor Ford White, and Rustoleum Crystal Clear. No final polishing was required. Various shades of Tamiya paints were used for interior, chassis, and engine details.


The overall build process proceeded very well, but I did encounter difficulties installing parts number 49 (rear intake top), 53 (left turbo exhaust)  and 54 (right turbo exhaust) because of their tight fits.  The rest of the project was routine and I am pleased with the outcome.  This is a well-designed, well-detailed, high quality kit that produces a very good replica of the 1:1 automobile.

Mike Crespi builds & reviews this Aoshima motorcycle: I’ve been under the impression that Aoshima kits are pretty close to Tamiya kits in quality. Well this will be my first Aoshima to build. I will be building this kit box stock as there are no aftermarket detail kits for it and I can’t find anything on the 1:1 bike for detailing information. I just have the instructions and box art. Here is a picture of everything laid out that comes in the box:

Figure 1

Well, the first step is assembling the wheels. So the wheel centers and spokes have to be painted semi- gloss black. This requires some tricky masking of the rim. See Figure 2.

Figure 2

Looks like the masking worked pretty well. I sprayed the semi-gloss black and removed the masking. I had to then put back the silver radial lines from the cooling fins on the wheel. That was real easy with a Molotow pen. See Fig 3:

Figure 3

Well, I can see now that these kits do not compare to Tamiya kits. They lack detail. The chain only has the links molded on the outside. Tamiya has the links molded on all four sides of the chain. Tamiya kits are way better. But so far this kit has been building easily. Below are the wheels installed on the front fork and rear swing arm. The swing arm has some nice sink marks. See Figure 4.

Figure 4
The engine is fairly simple as well.

Now I’m getting somewhere. I have the rear suspension and the engine attached to the frame. This kit does assemble easy enough and the parts fit together well. But there are sink marks in the rear swing arm. See Figures 6 and 7:

Figure 6

Now I have the fork installed with the headlight and front turn signal assembly. I used BMF for the reflector in the turn signals and used Molotow Chrome for the reflector in the headlamp assembly. So far everything has been easy to assemble. See Figures 8 & 9 below:

Figure 8

I glued the exhaust system together. The mufflers were done in two haves. The chrome quality is very nice but having a glue seem down the center was quite unsightly. I tried to get away with Molotow chrome but it looked bad. So I did sanding and used AlClad Chrome which came out pretty good. See Figure 10:

Figure 10

It sure wasn’t easy gluing the exhaust system to the bike. There were a couple of holes on the inboard side of the mufflers that went onto pins on the frame. But it has four individual header pipes that went from the crossover assembly to the engine block. Only the two inside cylinders had rings for the pipes to fit into.

Then I assembled the seat and gas tank to the frame. The seat had a few fairing parts around the back and sides. And after all that was done I applied the decals. They came off the sheet fairly quickly. I didn’t do a perfect job either. That last thing I did were the side view mirrors and the license plate frame. The mirrors have some nice sink marks right in the middle. All in all I was not really enthusiastic about this kit as it did not meet up to the standards of the Tamiya motorcycles I’ve built Here is a finished photo:

Name:  Jim Shepherd

When did you start building models?  Around the age of 7 or 8

Why?  I always liked cars and like the idea of building miniature cars that I liked.  Also, the box art caught my attention and still does.

What was the first model car you built?  It was a 1963 corvette – that my uncle repainted while I was asleep.

What types of models do you build?  I like factory stock and restomods.

What brand(s) of models do you build the most?  Revell and AMT

What do you like most about model building?  I find it relaxing.

What part(s) of model building do you find the most challenging?  The sanding and polishing to get that brilliant shine!

Anyone special who provided you guidance/inspiration/support?  I would build models occasionally, but when I met the guys from the ACME Club I really started to build a lot of models.

If you could have one older kit reissued what would it be?  The one I am searching for is the MPC 1985 Pontiac Trans Am

What new model would you like to see issued?  I would like to see 4 door cars and wagons from the 1950’s & 1960’s.

Bob McAllan built and reviews Revell’s new 1969 Boss 302 below:

The Mustang for 1969 was the first major restyle of this iconic Pony Car class from Ford. The Boss 302 was a special model that emphasized the importance of winning on the racetrack with a regular production car. The phrase “Race It On The Weekend-Drive It On Monday” was a major advertising lead-in for Ford’s print and television marketing at that time. Since the rules for racing in various classes varied so much Ford offered accessories to buyers all the parts that race teams of the day needed to be competitive on many levels. The styling of the Boss 302 was done by Larry Shinoda and gave the car its distinctive appearance. The car offered a special version of Ford’s thin-wall small block V-8. To add to its appeal to young buyers and racing enthusiasts Ford added front and rear spoilers and special paint and decal markings. This kit represents the 69 Boss 302 very well as the most popular vintage Mustang currently on the collector market.

Start with the 21-piece V-8 engine assembly; it makes into an accurate example of this iconic engine. The 302 engine became the basis for many of Ford’s engine platforms over the past 50 years. It  assembles into a stock version of this engine with a single 4-barrel carburetor, separate distributor and coil, a detailed front cover with water pump detail, a separate oil filter unit, upper radiator hose, starter and generator, fan and drive unit. It has well detailed exhaust manifolds, chrome valve covers w/ breather cap and air cleaner with accent decal. While the engine appears complete when finished and painted it lacks a fuel pump, a bracket for the alternator and a lower radiator-to-engine water hose.

The kit contained Tampo printed Firestone Wide Oval tires and stock wheels to build a very realistic factory stock appearing model. I substituted Cragar 5 spoke deep offset chrome mag wheels from my parts box to add a more aggressive look.

The kit has a generic 6-piece interior tub carried over from Revell’s previous variations of the 69-70 era Mustang cars. The tub did not have separate door panels and back seat. The center console was molded into the floor between two 2-piece generic bucket seats. The interior had minimal molded in detail on the door panels but did include excellent wood grain decals to accent the dashboard gauge surrounds and gauges and shift lever area on the console. The decals are thin and needed a lot of fiddling to make them lay down around the gauge surround areas. There is a chrome gearshift lever that needed some rubber paint to reflect a real appearance and has a ting accent decal for the knob.

Next is the 7-piece chassis with a molded in front suspension assembly, a 1-piece driveshaft, axle and spring unit, a 2-piece exhaust pipe-muffler system and four detailed shock absorbers. I painted the chassis Krylon matte black and the front and rear suspension units Krylon semigloss black. The exhaust system and the masked off gas tank were painted dull aluminum to look better than the call out colors recommended by the instructions. I modified the ride height of the front spindles by snapping off the mounting pins on the front end and reset them about 4 scale inches to give the car a more aggressive stance.

The clear window glass was a 1-piece unit that went in well. The 4 clear headlight lenses were mounted into chrome buckets that fit into fender the headlight areas and the other two were mounted into the rear of the grill assembly. The 2 read clear taillights mounted into the rear body fascia panel. The only problem with the grill was it was supposed to be a chromed unit. But when Revell redesigned the front fascia unit to correct prior design errors on earlier model editions they had it cast as a white plastic part. The chrome accent edges are very thin and it takes a steady hand to pick out the chrome surround with whatever trimming material you prefer. I tried both chrome foil and Molotow chrome pens unsuccessfully and ended up using chrome paint and a very fine detail brush as a last result.

The kit was molded in white polystyrene. The 6-piece body consisted of front and rear fascia units, the main body, hood and two door mounted rear-view  mirrors with chrome mirror inserts. The only mold lines were at the ends of the front fender areas. The most serious issue was that there was a large molded indentation area on both sides of the roof just behind the door small side glass area. These indentations were not on any of the earlier Revell versions of this 69 Mustang car. I had a devil of a time securing body putty into these areas until I drilled a hole into each of the indentations to act as an anchor. Then sanding it to form the correct curve of the roof sides. The body and hood had some fitment issues after the radiator top was installed during assembly and required some sanding and fitting to allow the hood to fit even with the grill and front fender lines on each side.

I painted the body, hood, front and rear facias and side mirrors with Tamiya TS-11 Maroon lacquer. I obtained one of the best rattle can paint jobs ever with no need for a clear coat and minimal polishing. My difficulties began with the paint call out for the requiring a masking of the hood and cowl area  to apply the satin black hood paint. I used Krylon Satin Black and it looked great, but after repeated attempts to align the decal to define the satin painted area failed I said to heck with it since the edge of masked area did not have the same sheen and the decal was so thin I opted for no other distinctive body graphics decals for the side and trunk lid either. I used the front Satin black spoiler and the rear window louvers but omitted the rear deck spoiler.

All the assembly units fit together well except for the trouble with attaching the side mirrors and the front spoiler. If I were to attempt building this or any other model with this type of attachment points, I would drill a small pilot hole into the body and then place a thin wire or round mounting pins to these parts to keep them from constantly falling off. This was the reason I left the 3-piece rear spoiler off.

The chrome pieces were excellent, but someone needs to have Revell include the reworked grill into the chrome tree.

Overall, I enjoyed the model build and with a little more pre-assembly drilling holes for parts attachment and fabricating mounting pins it will likely be easier to replicate a more accurate replica of this highly collectable muscle car.