I am sure many of you have seen the various “Woodies” built by Robert Sienko at our meetings, various contests, in Scale Auto, or on Face Book. To say Robert has mastered using wood to create unique models is an understatement.
Robert Brough several samples of models he has used wood on to either create a more realistic pickup bed, add true wood panels to a Woodie, create scale surf boards and even create complete bodies for his builds.
He information not only the types of wood he uses but also where to find them, how to work with them from original shaping to finishing, staining, etc. .
Check back tomorrow for some pictures from his workshop,
Well, it’s a Tamiya kit so it’s likely to go together trouble free. Here is the spread of all the parts trees in the box:
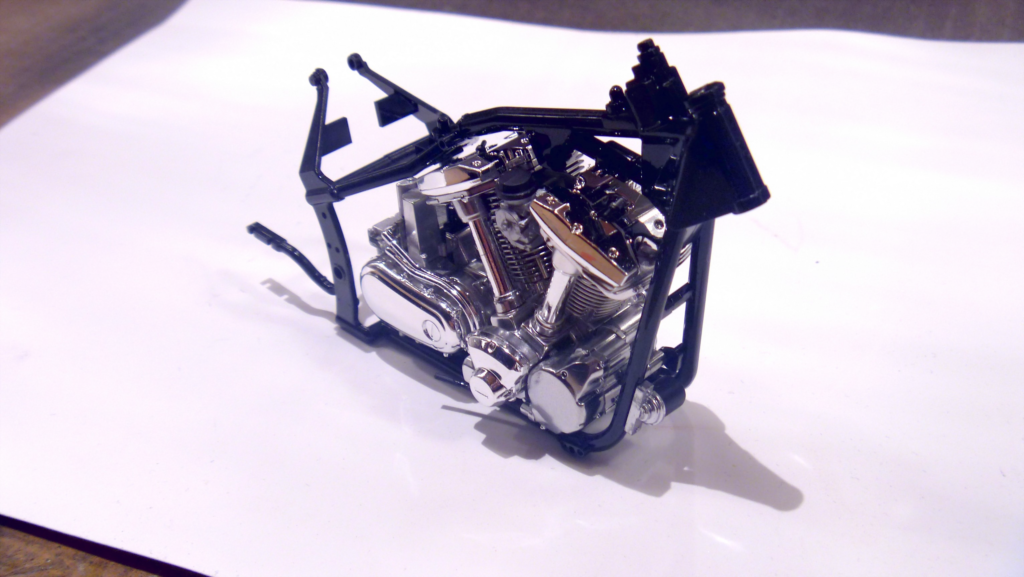
Here’s the engine installed into the frame. The main frame goes together quite easily as there’s two sides and a small middle piece. It also has a nice kickstand that attaches with a metal bracket that gets screwed into place. The engine color calls for polished aluminum, so I used the AlClad Polished Aluminum. The engine also assembles very nicely and pretty easily too. It was easy to insert into the frame too, it’s held in place with three screws.
Here’s the shock assembly, it was pretty easy to build and paint. I used the Al Clad Titanium Silver as opposed to the Tamiya color, although I have both. I think this assembly will be completely hidden when the model is completed.
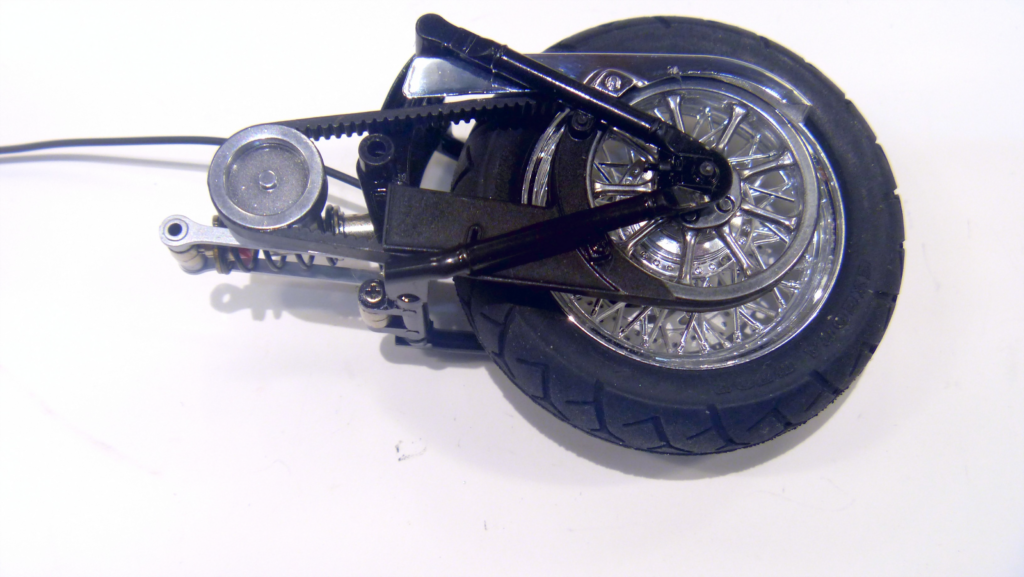
The wheel is a little trickier, first I had to drill out all those little holes in the brake rotor. It goes together easy enough but there are little mating pins on the inside ends of the spokes to align with the hubs, I used CA on it. There is an inner brass tube for the axle, once it’s together you have to insert it into the tire. You have to be more careful than on the racing type bikes with the one piece wheels. You don’t want to push against the spoke while inserting the wheel into the tire. That’s a good way to break the spokes and then you’re in some real trouble. So as you can see I got the wheel into the tire correctly.
I have the belt and pulleys all painted up, I painted the pulleys with Al Clad Polished Aluminum. One detail that’s a little lacking is that they didn’t mold the teeth into the rear pulley on the inside where the pulley is exposed. The front doesn’t matter as it will be hidden anyway. It turns out that when it’s all installed into the rear swing arm there is a lower guard in front of the rear pulley so you wouldn’t see the teeth anyway. I masked over the pulleys so I could brush paint the flat black onto the belt without messing up the pulley sides because the belt’s height is a little above the pulley’s and I wanted the paint to cover it.
The rear swing arm went together fairly easily. But it was a bit tricky getting together the left side with the belt/pulleys and lower belt guard together. Once that assembly was dry then the rest was pretty smooth.
So far this kit has been going together very well. Next is installing the rear swing arm into the frame. That went pretty easy too.
Now here are the fenders and gas tank. The rear fender is three pieces and the gas tank is in two halves. The two side skirts on the rear fender I painted separately. I painted everything else in Tamiya’s champagne gold. Those Tamiya lacquers have nasty fumes, I had perfect weather to spray them outside. It also does not have a high gloss shine. So next I masked the gas tank. They give you a pre-printed masking tape and the instructions show you how to place them. I easily masked the front fender to paint the sides. After all that was dry the next day I painted Testors clear gloss coat over it. See the photos below.
Now the model is starting to look like a bike. The fork went together pretty easily. I did have to do some detail painting on the brake calipers and paint some black onto one of the chrome cross pieces. I installed more detail parts onto the frame and installed the fork onto the frame. When I glued the two halves of the mufflers together I didn’t like the seem line so I sanded it smooth and used Al Clad chrome on it. It came out pretty good. There is a bracket molded into it that gets painted black, easily done with a brush. The gas tank has a nice emblem on the side. It’s chromed and then detail painted, easy to do. I used black India ink for the recessed letters and the Star. and I used a champagne gold enamel I had to paint into the “wing”. The directions called for metallic gray but the box art had the champagne gold so I went with that. There are a number of rubber hoses to hook up for the brakes and clutch. I have some hooked up. Those are a little tricky to push onto those tiny plastic pins, I usually stick a sewing pin into the hose to stretch it a little bit.
The footrest assemblies went together pretty easily, some painting is required over the chrome parts. They align with square pins or round pins with a flat. The assemblies then attach to the frame, I glued them on but they each get a screw to really secure them in place.
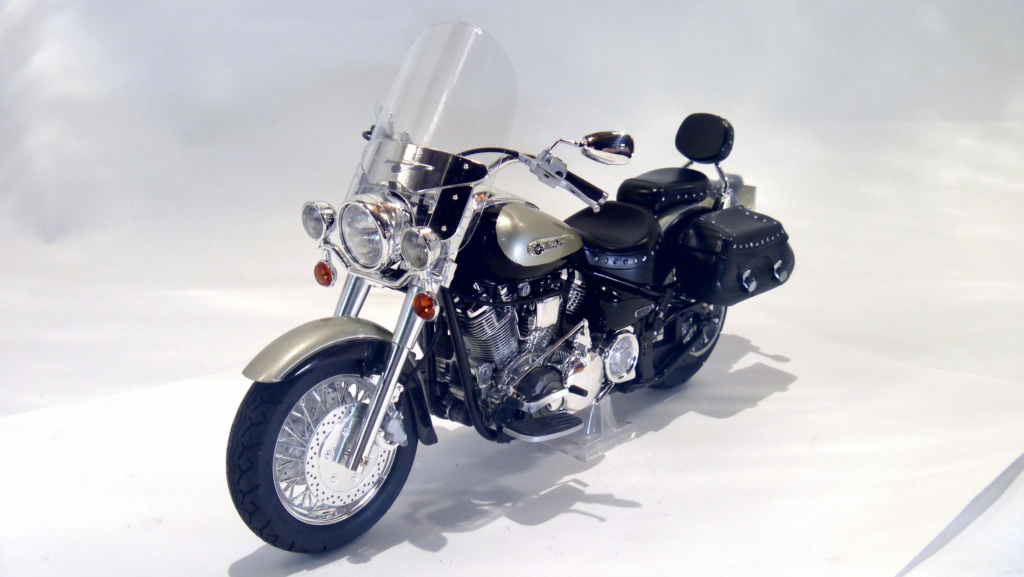
Now the bike is finished. I have installed the final details, the windscreen, the mirrors, the headlight assembly, etc. The seats and saddlebags were easy to assemble and I sprayed them semi gloss black and used Molotow Chrome on all the rivet heads. I used it on the handle bar and foot peg ends too. All the lenses were clear and I used the Tamiya clear orange and red to paint them. I found I had left off a few small decals in places by the time I was nearly finished but they were all accessible to apply them. A really good kit to build, now onto the rider figure.
The model even has a working kickstand.
Here’s the kit. He can be built two ways, The first as you see him in the box art. The second is with him wearing a woolen beanie cap, holding his helmet and he also has sunglasses he can wear. I think I’ll build the second pose. You can see the two pictures on the instruction sheet.
I have not built a figure before so I don’t know how good I’ll be able to paint him but he’s going together real easily. The texture is well molded and he’s looking pretty good so far. First here’s just the legs:
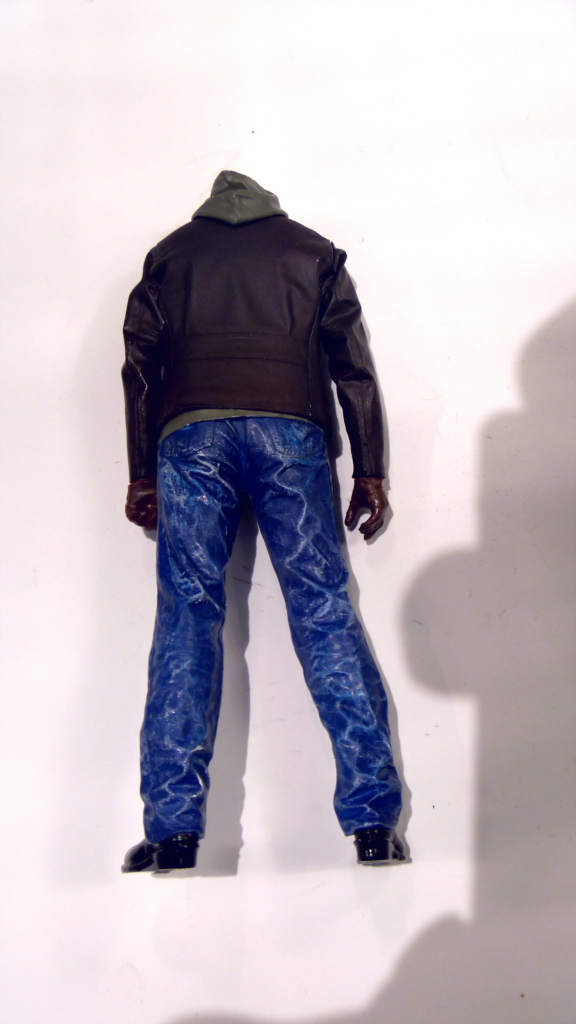
The jacket assembles over the legs in three pieces. But first I painted the legs blue. It doesn’t matter what shade as jeans come in so many. Then I dry brushed some light blue and then white over it. Next I painted the leather jacket. The instructions call for semi gloss black as shown in the box art but I went for a brownish color that looks just like a jacket I have. The color is Testors Rubber which is really just a dark flat brown. So I painted the three pieces first. Then I did the arms the same color. There’s also the gloves and the hood. The hood and what you can see of the shirt are flat gray. The shirt is part of the leg assembly.
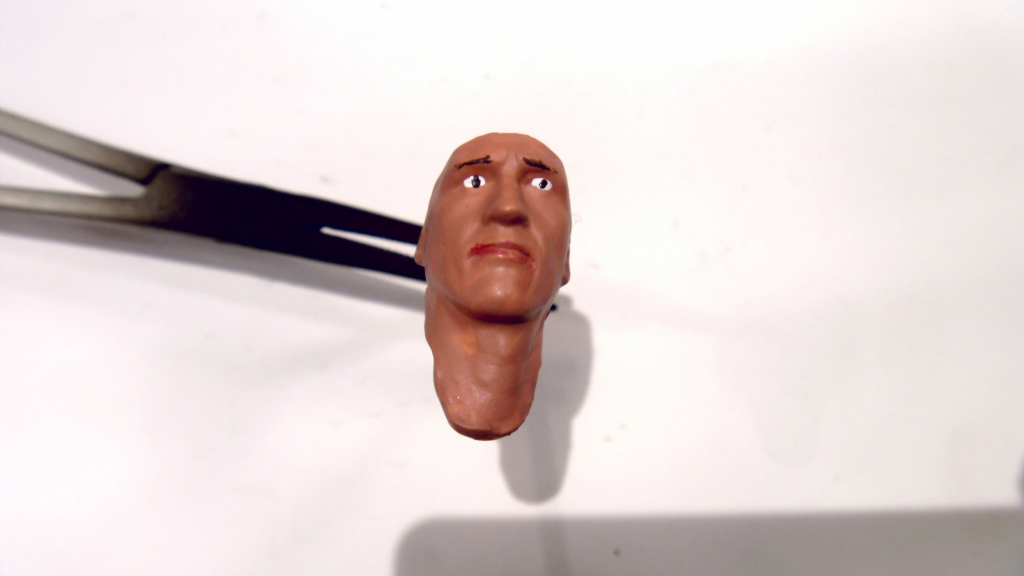
The next challenge is the head, especially the face. Here’s what I’ve done so far:
I painted the skin with Testors Skin Tone Warm Tint, the lips were painted with highly thinned red. At first it looked like lipstick, but then I lightly painted the Skin Tone over it and that made it look realistic.Here he is all finished. He seems to have a blank stare but it is what it is.